Rescue mode is not available at certain locations. If you don’t see this option in the Actions menu, it’s not supported at your server’s location.
Booting into Rescue Mode
In order to boot into rescue mode, simply go the server page, click Actions and select Rescue mode.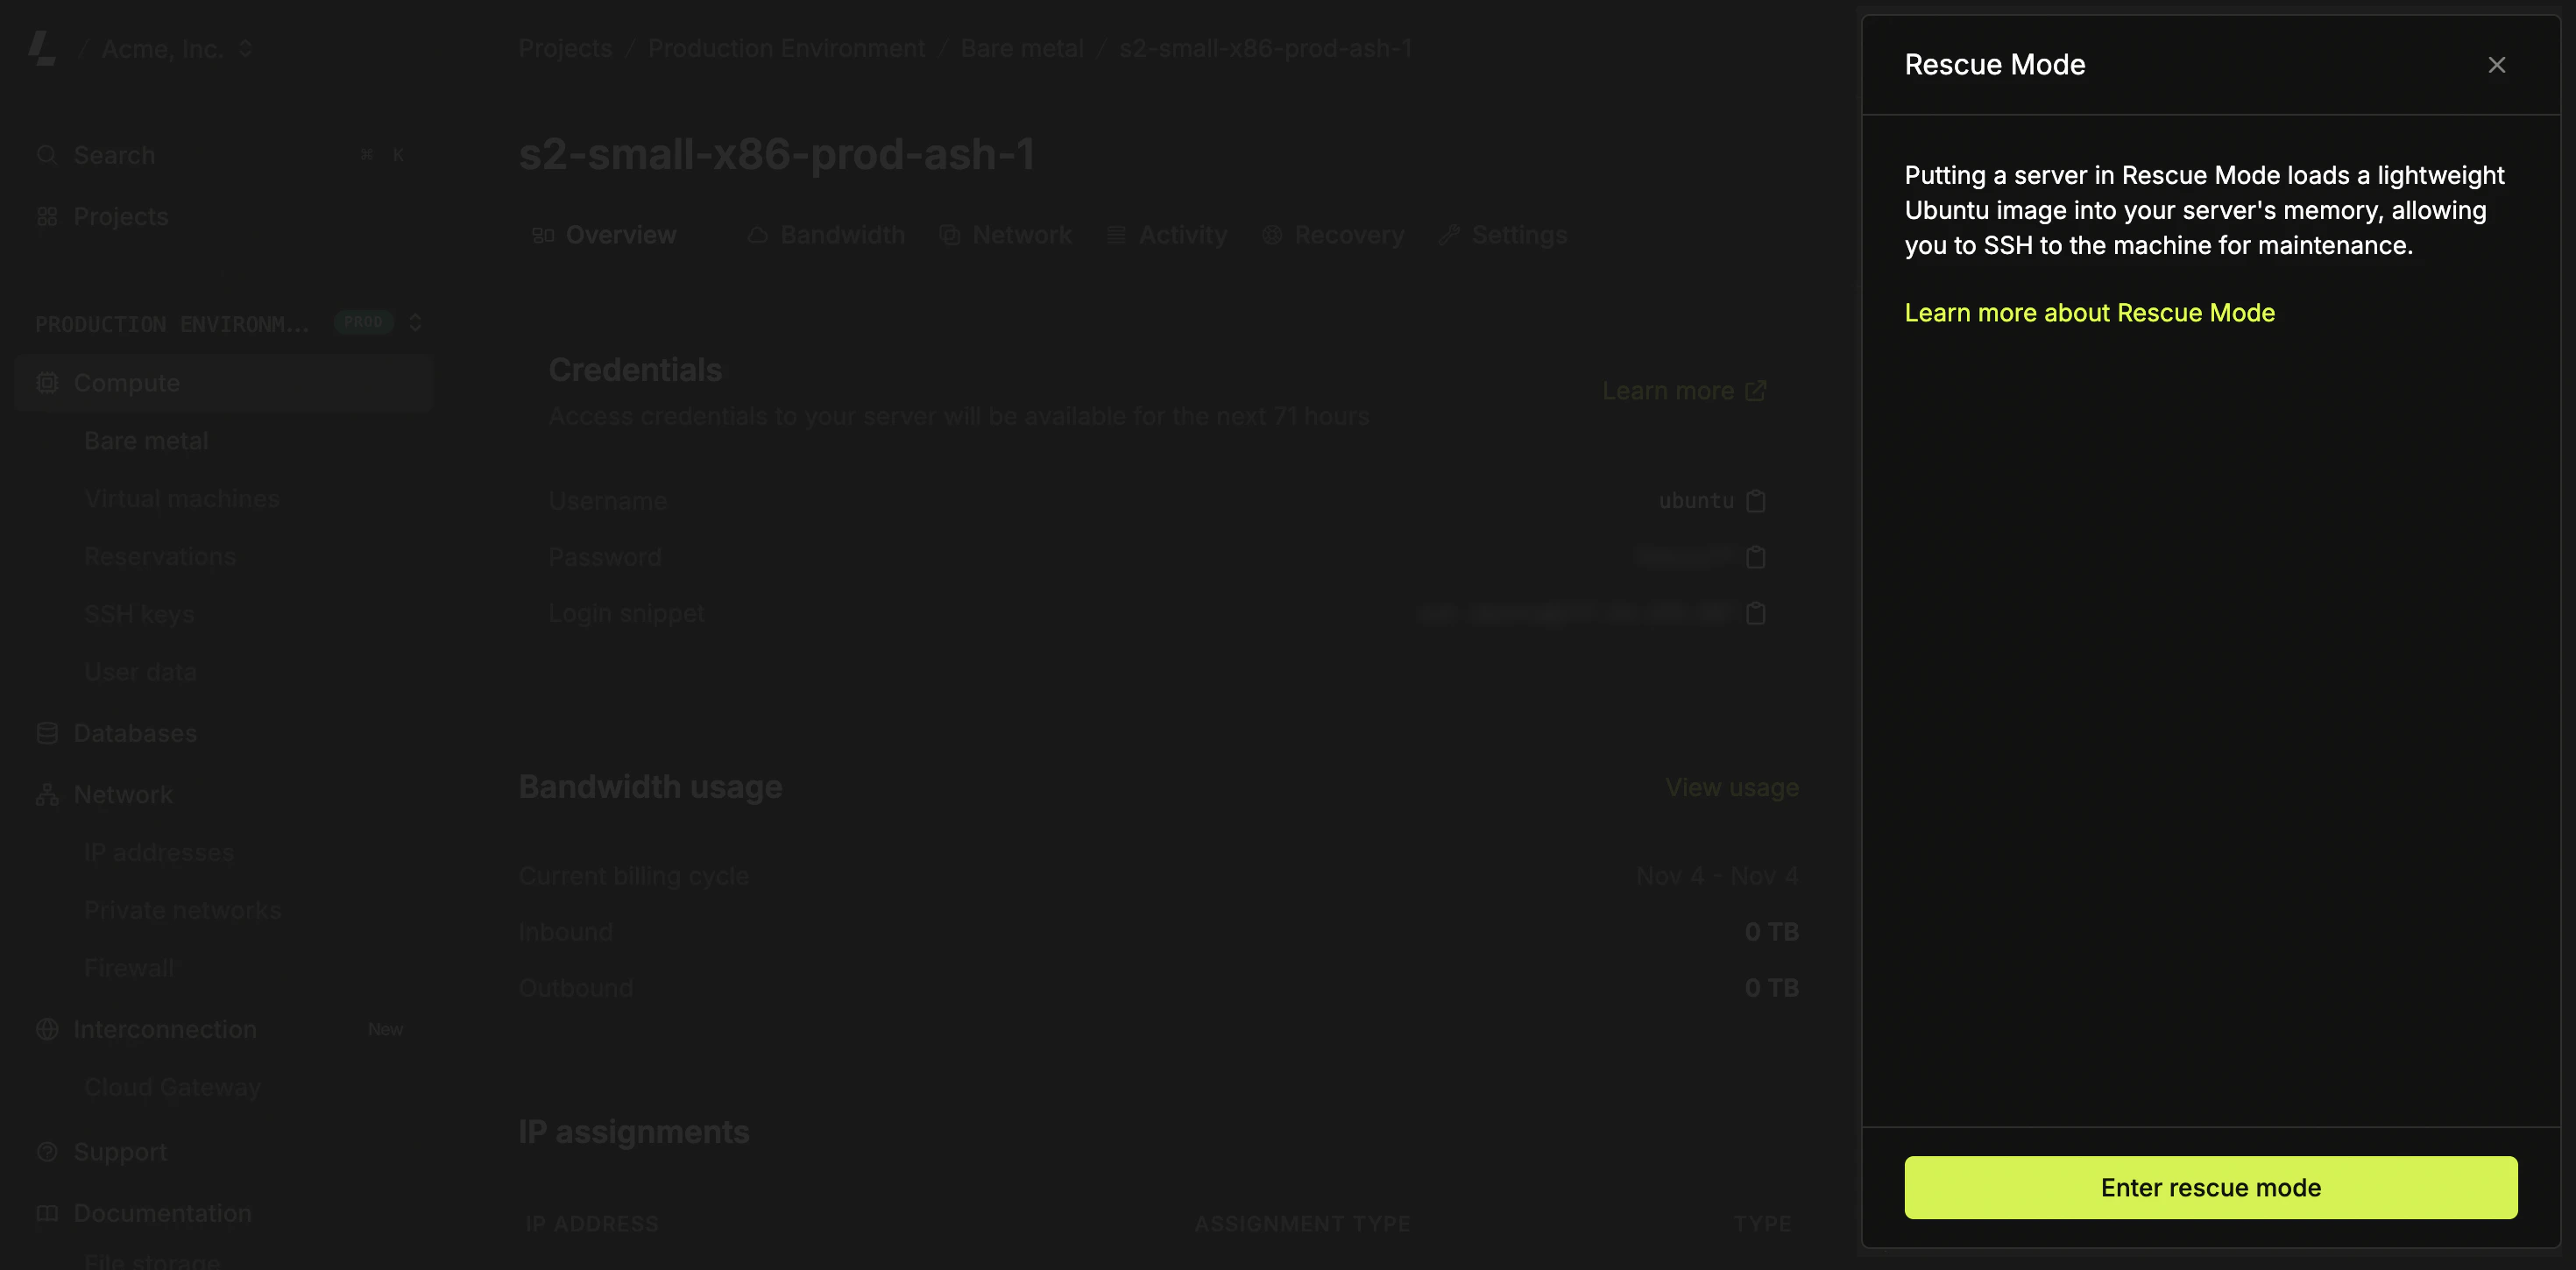
Accessing the server
When the server finishes loading the rescue operating system, a user and password with root access will be shown on the server page.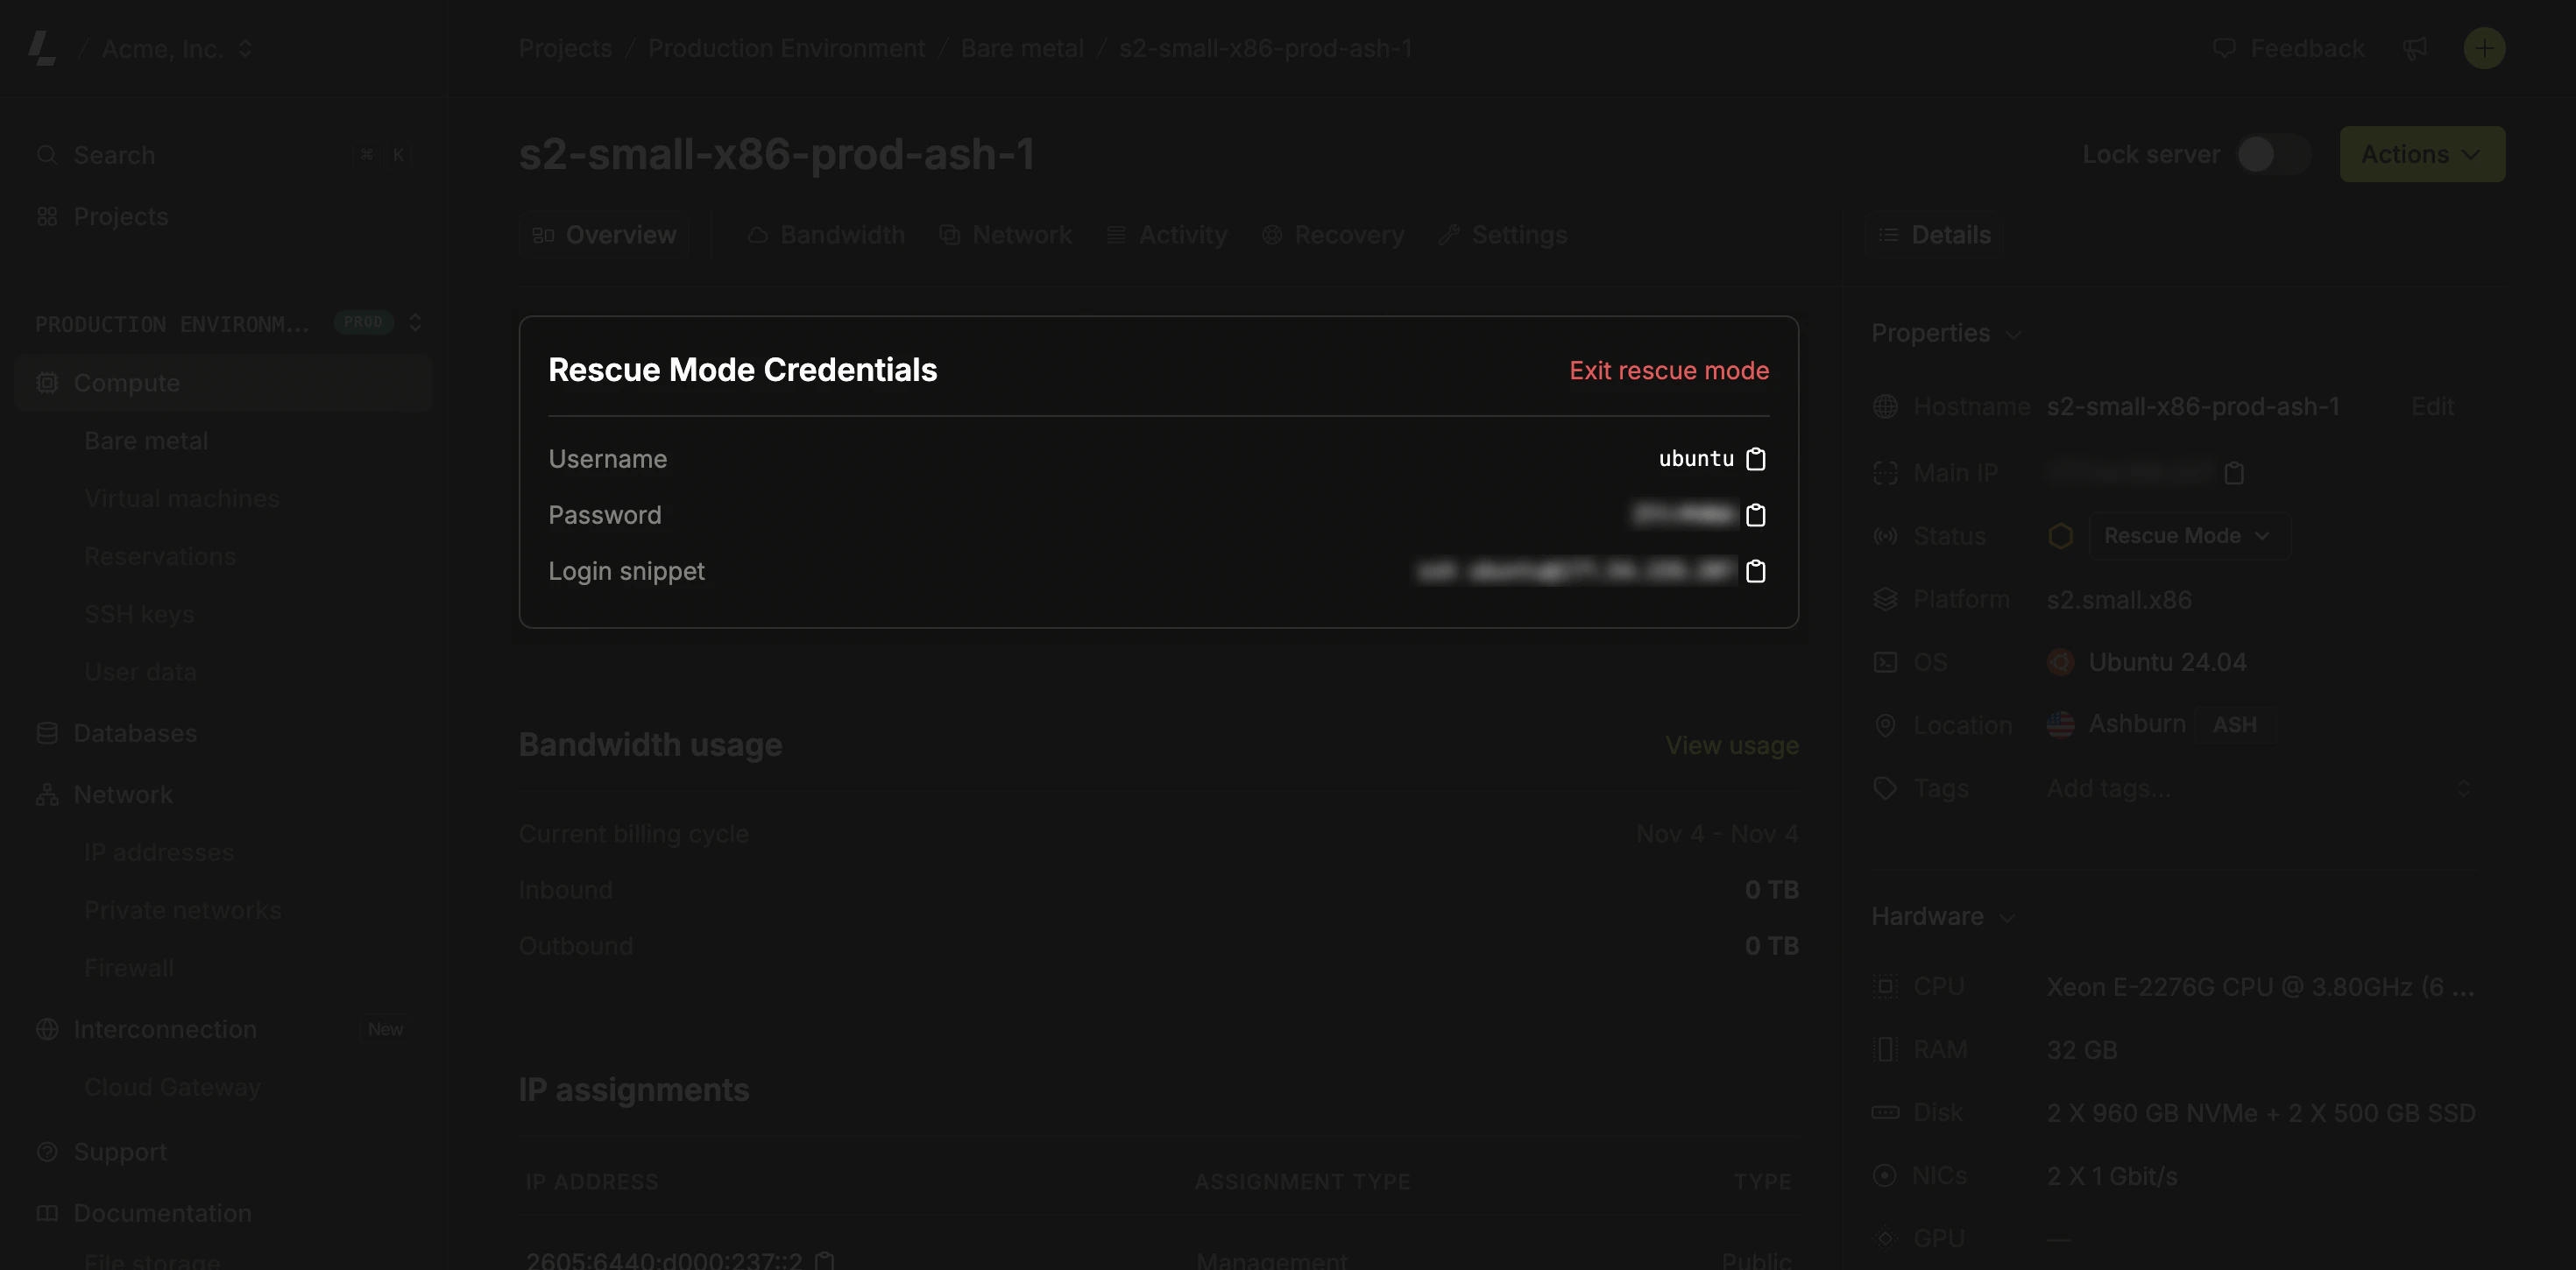
Mounting the root partition
The first thing to do is find the root partition. Runninglsblk will retrieve all partitions. Find the disk that represents the root partition of your server. This is usually the largest partition from the ones listed.
Mount the partition replacing the placeholder with the root partition name:
/dev/sda2 is being mounted to the /mnt dir.
Root partition for servers with NVMe disks are slightly different, similar to the example below:
/mnt directory to work on your files.