

Prerequisites
- A Kubernetes cluster with at least 3 nodes
- kubectl CLI installed on your local workstation
- Helm installed (for installing Longhorn)
Step 1: Prepare your cluster
1
Check available disks
Run
lsblk on each node to find available disks and partitions to dedicate to Longhorn.2
Label nodes (Optional)
Label your nodes to control which ones will be used for Longhorn storage:
Step 2: Install Longhorn
Longhorn can be installed on a K8s cluster in several ways. In this guide, we’ll go with Helm.1
Add Longhorn repository
Add the Longhorn Helm repository:
2
Install Longhorn
Run this command to install Longhorn:
3
Verify installation
Verify the installation:All pods should be running without errors.
Step 3: Access the Longhorn UI
1
Check services
Run this command to check if the Longhorn services are up:The output should be something like this:
2
Set up port forwarding
Set up port forwarding to the frontend service:
3
Access dashboard
Navigate to 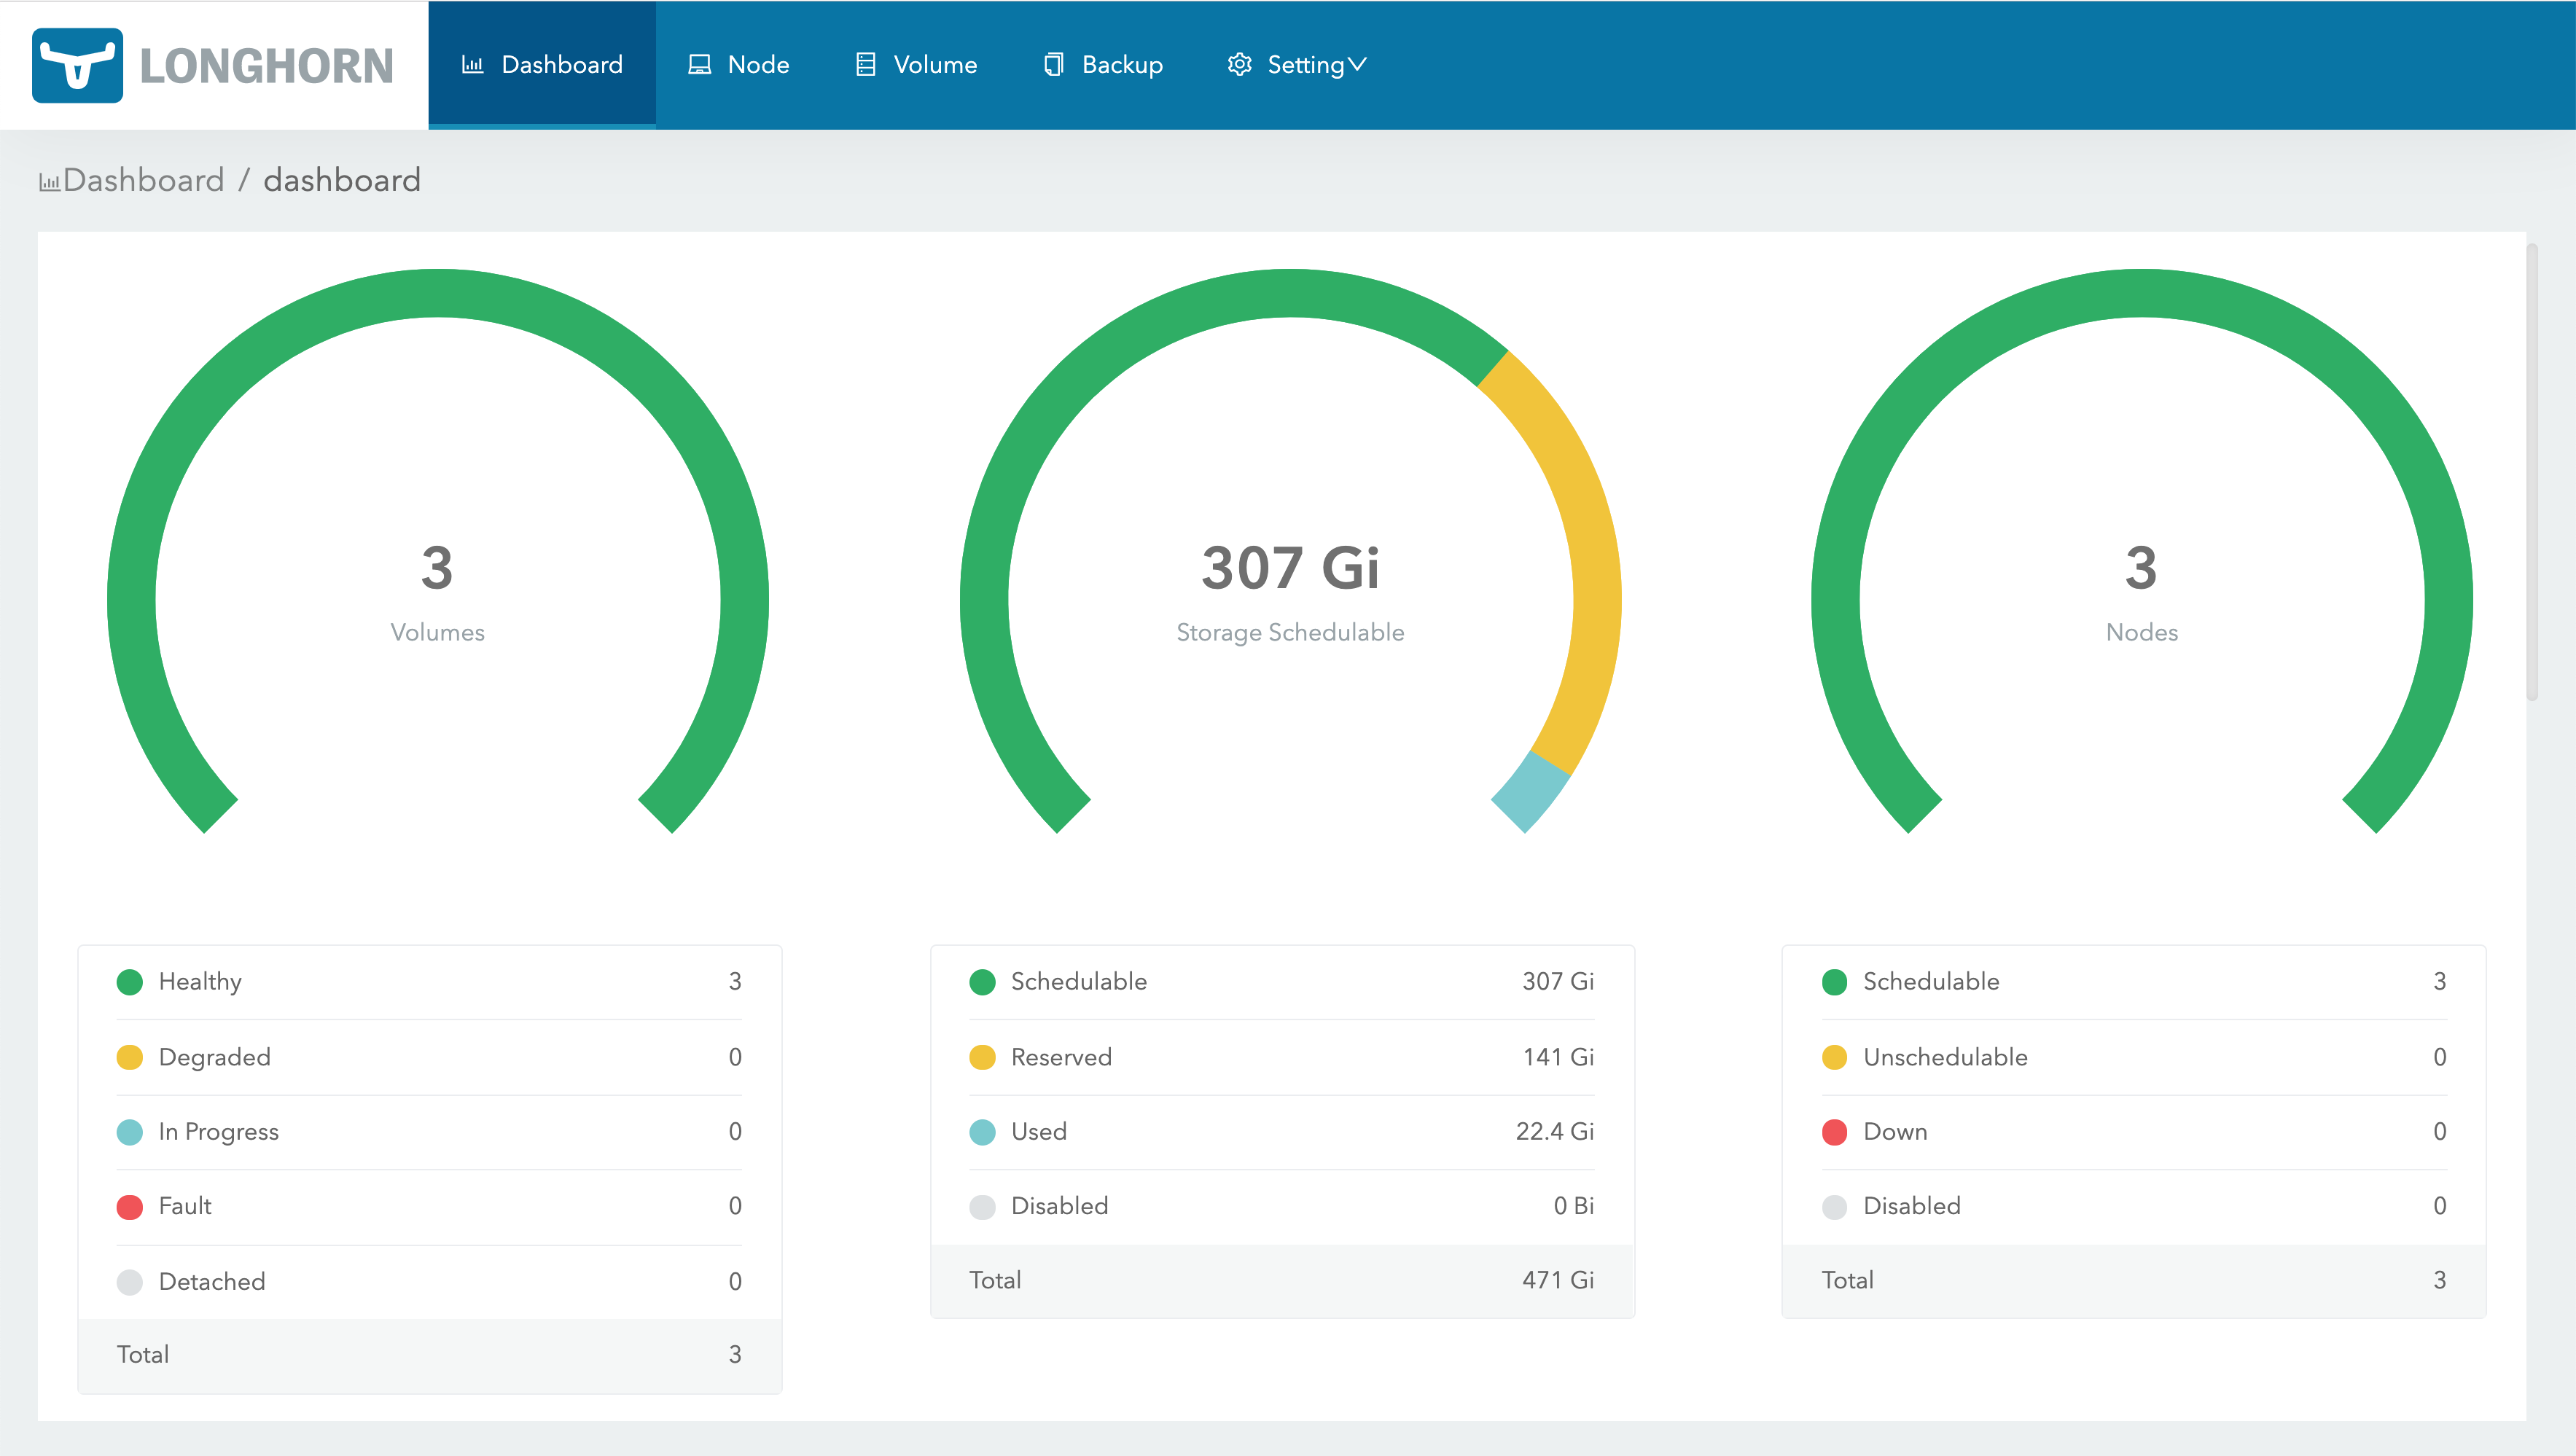
http://localhost:8080 in your browser to access the Longhorn UI. You’ll be taken to this dashboard:Step 4: Configure storage
1
Check nodes
In the Longhorn UI, navigate to Node and check if your disks are detected automatically.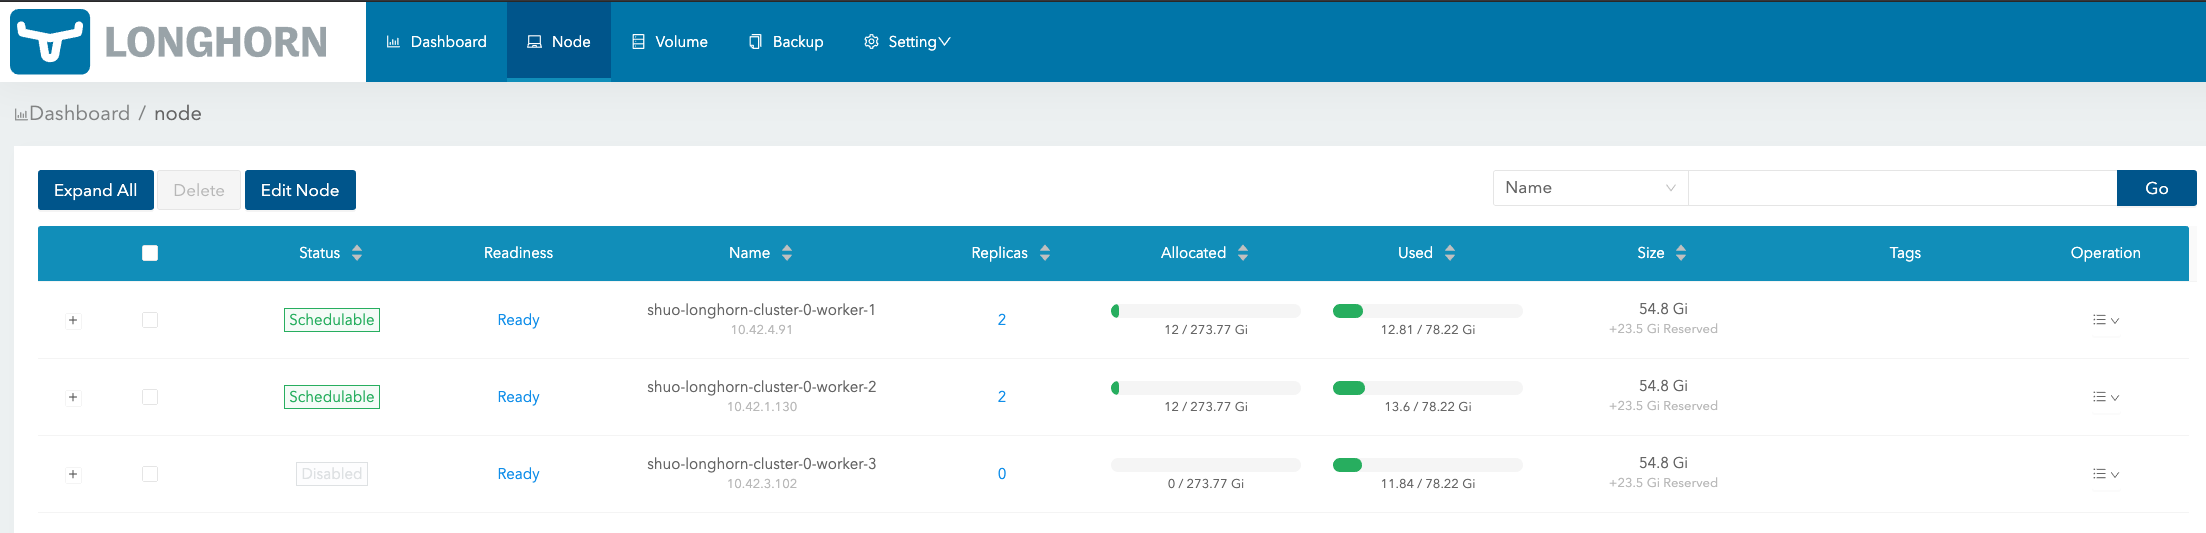
2
Define disk usage limits
Define disk usage limits and scheduling. Make sure your nodes have enough space to handle the intended workload.
Step 5: Create a StorageClass
1
Create StorageClass manifest
Create a StorageClass manifest named
longhorn-storageclass.yaml:2
Apply StorageClass
Apply the StorageClass:
3
Set as default (Optional)
Set the StorageClass as default:
Step 6: Create a PersistentVolumeClaim (PVC)
1
Create PVC manifest
Create a PersistentVolumeClaim YAML file named
longhorn-pvc.yaml:2
Apply PVC
Apply the PVC:
3
Verify PVC
Verify the PVC:Make sure the status shows Bound to confirm it worked.
Step 7: Use the PVC in a Pod
1
Create Pod manifest
Create a Pod that Uses the PVC, save this as
longhorn-pod.yaml:2
Deploy Pod
Deploy the Pod:
3
Check Pod status
Check Pod status:The Pod should be running without issues. You can check if the data persists by inspecting the mounted directory.
Troubleshooting
- If Longhorn nodes show as unschedulable, check disk space and ensure no taints are blocking pods.
- For performance tuning, you can adjust the number of replicas for each volume in the Longhorn UI under Settings > Default Settings.
- If using firewalls, ensure ports 9500-9600 are open for communication between Longhorn components.