> ## Documentation Index
> Fetch the complete documentation index at: https://www.latitude.sh/docs/llms.txt
> Use this file to discover all available pages before exploring further.
# Cloud Gateway
Cloud Gateway establishes a private, secure, and direct connection between your Latitude.sh servers and major cloud providers.
To connect Latitude.sh's infrastructure to your cloud provider's resources, log in to the [dashboard](https://www.latitude.sh/dashboard), select a project, then navigate to **Interconnection > Cloud Gateway** in the sidebar.
Complete the required fields to submit your request. Once submitted, the team will handle the configurations.
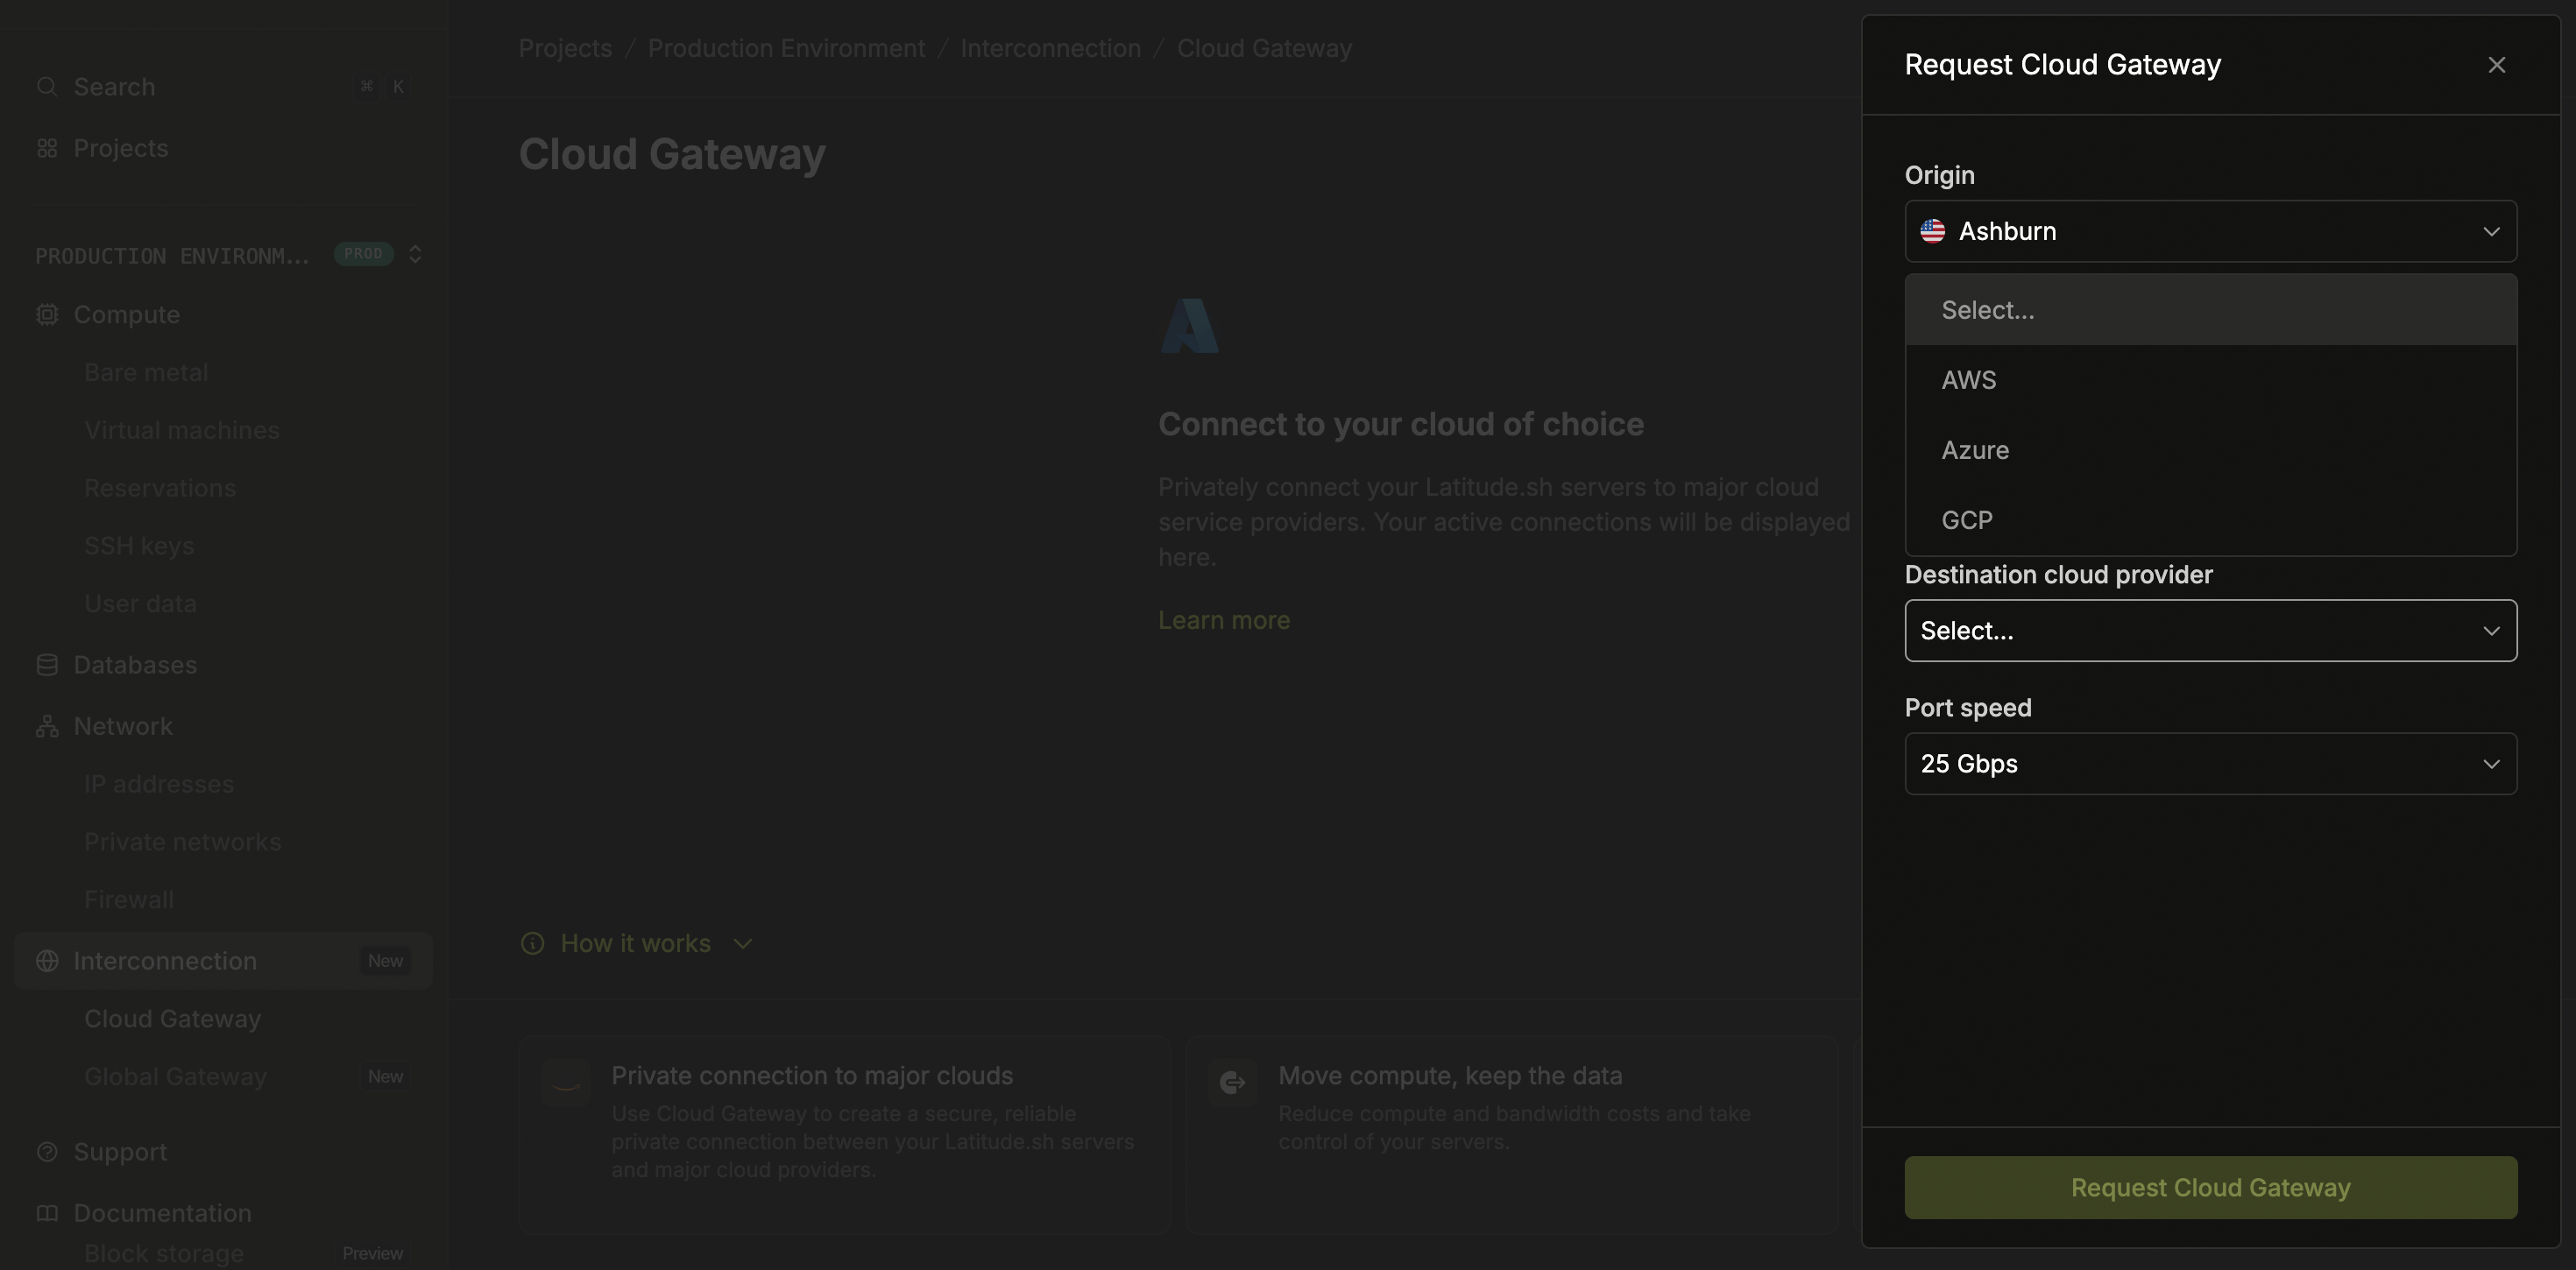 Choose the location of your Latitude.sh server from which you want to establish the connection to AWS. Optionally, select a [private network](/networking/private-networks) if one is configured.
Enter the IP address range in CIDR format. The IP prefix is associated with your on-premises network and needs to be routable to AWS.
Select AWS as the destination cloud provider and enter the AWS region where your [Virtual Private Cloud (VPC)](https://aws.amazon.com/vpc/) or other resources are hosted. You can find this information in the top right corner of the [AWS Management Console](https://aws.amazon.com/console/).
Enter your 12-digit AWS account ID from the **My Account** section in the [AWS Management Console](https://aws.amazon.com/console/).
Enter your Amazon Autonomous System Number (ASN), found in the [AWS Direct Connect Console](https://console.aws.amazon.com/directconnect/home) under Virtual Interfaces.
If you don't have a virtual interface, create one through the Direct Connect setup process. See the [AWS Direct Connect User Guide](https://docs.aws.amazon.com/directconnect/latest/UserGuide/accepthostedvirtualinterface.html) for more information.
Choose the desired port speed for your connection from the available options. Once all fields are completed, click **Request**.
**Canceling the connection to AWS**
To cancel the connection between Latitude.sh and AWS, follow these steps:
Log in to your AWS account and remove the connection associated with Cloud Gateway. Next, go to **Support** in the [dashboard](https://www.latitude.sh/dashboard) and create a **New ticket** to request service cancellation.
The connection will be terminated once both steps are completed and the team processes your request.
Choose the location of your Latitude.sh server from which you want to establish the connection to GCP.
Select a [private network](/networking/private-networks) if one is configured
(optional).
Enter the IP address range in CIDR format. The IP prefix is associated with
your on-premises network and needs to be routable to GCP.
Select GCP as the destination cloud provider.
Enter the GCP region where your resources are hosted.
Log in to your [Google Cloud Console](https://console.cloud.google.com/) and
create a pairing key.
**Creating a pairing key**
From the main menu in the Google Cloud Console, select **Hybrid Connectivity > Interconnect**.
Choose the location of your Latitude.sh server from which you want to establish the connection to AWS. Optionally, select a [private network](/networking/private-networks) if one is configured.
Enter the IP address range in CIDR format. The IP prefix is associated with your on-premises network and needs to be routable to AWS.
Select AWS as the destination cloud provider and enter the AWS region where your [Virtual Private Cloud (VPC)](https://aws.amazon.com/vpc/) or other resources are hosted. You can find this information in the top right corner of the [AWS Management Console](https://aws.amazon.com/console/).
Enter your 12-digit AWS account ID from the **My Account** section in the [AWS Management Console](https://aws.amazon.com/console/).
Enter your Amazon Autonomous System Number (ASN), found in the [AWS Direct Connect Console](https://console.aws.amazon.com/directconnect/home) under Virtual Interfaces.
If you don't have a virtual interface, create one through the Direct Connect setup process. See the [AWS Direct Connect User Guide](https://docs.aws.amazon.com/directconnect/latest/UserGuide/accepthostedvirtualinterface.html) for more information.
Choose the desired port speed for your connection from the available options. Once all fields are completed, click **Request**.
**Canceling the connection to AWS**
To cancel the connection between Latitude.sh and AWS, follow these steps:
Log in to your AWS account and remove the connection associated with Cloud Gateway. Next, go to **Support** in the [dashboard](https://www.latitude.sh/dashboard) and create a **New ticket** to request service cancellation.
The connection will be terminated once both steps are completed and the team processes your request.
Choose the location of your Latitude.sh server from which you want to establish the connection to GCP.
Select a [private network](/networking/private-networks) if one is configured
(optional).
Enter the IP address range in CIDR format. The IP prefix is associated with
your on-premises network and needs to be routable to GCP.
Select GCP as the destination cloud provider.
Enter the GCP region where your resources are hosted.
Log in to your [Google Cloud Console](https://console.cloud.google.com/) and
create a pairing key.
**Creating a pairing key**
From the main menu in the Google Cloud Console, select **Hybrid Connectivity > Interconnect**.
 Click **Get Started**.
Select Partner Interconnect and click **Continue**.
Click **Get Started**.
Select Partner Interconnect and click **Continue**.
 Click **I already have a service provider**.
 Configure your attachment.
 Provide the following details:
* **Redundancy**: Review the options for redundancy and select. You can create redundant Attachments or a single Attachment.
* **Network**: Select the VPC network you want your VPC to connect to.
* **Region**: Select the region where your attachment will connect.
* **Cloud Router**: A Cloud Router to associate with this attachment. You can only choose a Cloud Router in the VPC network and region that you selected with an ASN of 16550. If you don't have an existing Cloud Router, create one with an ASN of 16550. For redundancy, each VLAN attachment must be associated with a unique Cloud Router. Google automatically adds an interface and a BGP peer on the Cloud Router.
* **VLAN attachment name**: Lowercase letters only.
* **Description** (optional).
* **Maximum Transmission Unit (MTU)**: To use the 1500-byte MTU, the VPC network using the attachment must have an MTU set to 1500. In addition, the on-premises VMs and routers must have an MTU set to 1500. If your network has the default MTU of 1460, leave the field at 1440.
Click **Create**.
Copy the pairing key and click **OK**.
Provide the following details:
* **Redundancy**: Review the options for redundancy and select. You can create redundant Attachments or a single Attachment.
* **Network**: Select the VPC network you want your VPC to connect to.
* **Region**: Select the region where your attachment will connect.
* **Cloud Router**: A Cloud Router to associate with this attachment. You can only choose a Cloud Router in the VPC network and region that you selected with an ASN of 16550. If you don't have an existing Cloud Router, create one with an ASN of 16550. For redundancy, each VLAN attachment must be associated with a unique Cloud Router. Google automatically adds an interface and a BGP peer on the Cloud Router.
* **VLAN attachment name**: Lowercase letters only.
* **Description** (optional).
* **Maximum Transmission Unit (MTU)**: To use the 1500-byte MTU, the VPC network using the attachment must have an MTU set to 1500. In addition, the on-premises VMs and routers must have an MTU set to 1500. If your network has the default MTU of 1460, leave the field at 1440.
Click **Create**.
Copy the pairing key and click **OK**.
 Go back to the Cloud Gateway form and paste the copied pairing key into the
**Pairing Key** field.
Choose the desired port speed for your connection from the available options.
Once all fields are completed, click **Request**.
Choose the location of your Latitude.sh server from which you want to establish the connection to Azure.
Select a [private network](/networking/private-networks) if one is configured
(optional).
Enter the IP address range in CIDR format. The IP prefix is associated with
your on-premises network and needs to be routable to Azure.
Select Azure as the destination cloud provider.
Enter the [Azure
region](https://learn.microsoft.com/en-us/azure/devops/organizations/accounts/change-organization-location?view=azure-devops)
where your resources are hosted.
Enter the service key from your [ExpressRoute
circuit](https://learn.microsoft.com/en-us/azure/expressroute/expressroute-howto-circuit-portal-resource-manager).
To generate one, create an ExpressRoute connection in the Azure Portal and
deploy the circuit.
Choose the desired port speed for your connection from the available options.
Once all fields are completed, click **Request**.
Go back to the Cloud Gateway form and paste the copied pairing key into the
**Pairing Key** field.
Choose the desired port speed for your connection from the available options.
Once all fields are completed, click **Request**.
Choose the location of your Latitude.sh server from which you want to establish the connection to Azure.
Select a [private network](/networking/private-networks) if one is configured
(optional).
Enter the IP address range in CIDR format. The IP prefix is associated with
your on-premises network and needs to be routable to Azure.
Select Azure as the destination cloud provider.
Enter the [Azure
region](https://learn.microsoft.com/en-us/azure/devops/organizations/accounts/change-organization-location?view=azure-devops)
where your resources are hosted.
Enter the service key from your [ExpressRoute
circuit](https://learn.microsoft.com/en-us/azure/expressroute/expressroute-howto-circuit-portal-resource-manager).
To generate one, create an ExpressRoute connection in the Azure Portal and
deploy the circuit.
Choose the desired port speed for your connection from the available options.
Once all fields are completed, click **Request**.