> ## Documentation Index
> Fetch the complete documentation index at: https://www.latitude.sh/docs/llms.txt
> Use this file to discover all available pages before exploring further.
# CLASTIX
> Setting up managed bare metal nodes in a Kubernetes cluster
In this guide, you'll learn how to configure bare metal servers as Kubernetes worker nodes using the CLASTIX platform.
This setup combines the ease of Managed K8s with the control and performance of dedicated hardware. Let's get started!
You can also use Terraform to set up your K8s cluster. Check our setup guide [here](https://github.com/latitudesh/examples/tree/main/terraform/kubernetes-clastix).
## Requirements
* 2 or more [Latitude.sh](https://www.latitude.sh/) servers
* [Kubectl](https://kubernetes.io/docs/tasks/tools/) installed on your local workstation
## Step 1: Set up your Kubernetes control plane
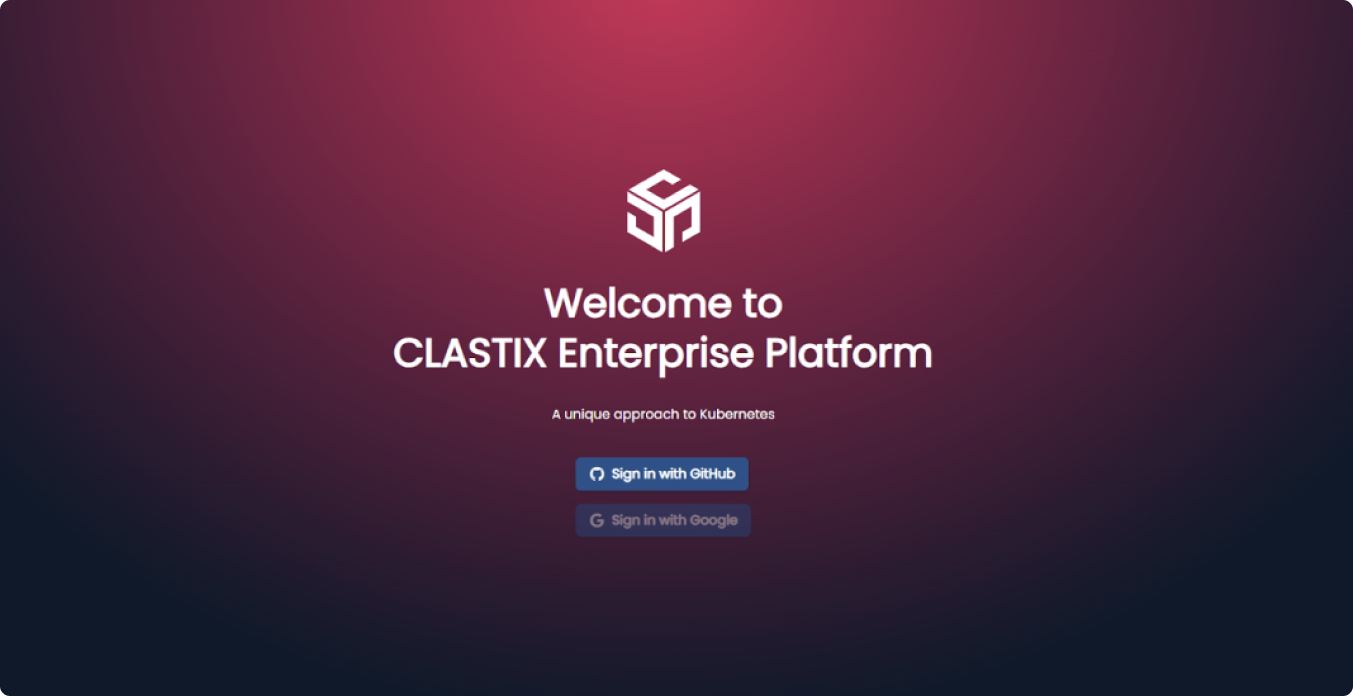
Access the [CLASTIX playground](https://console.clastix.cloud/) and log in with your GitHub account.
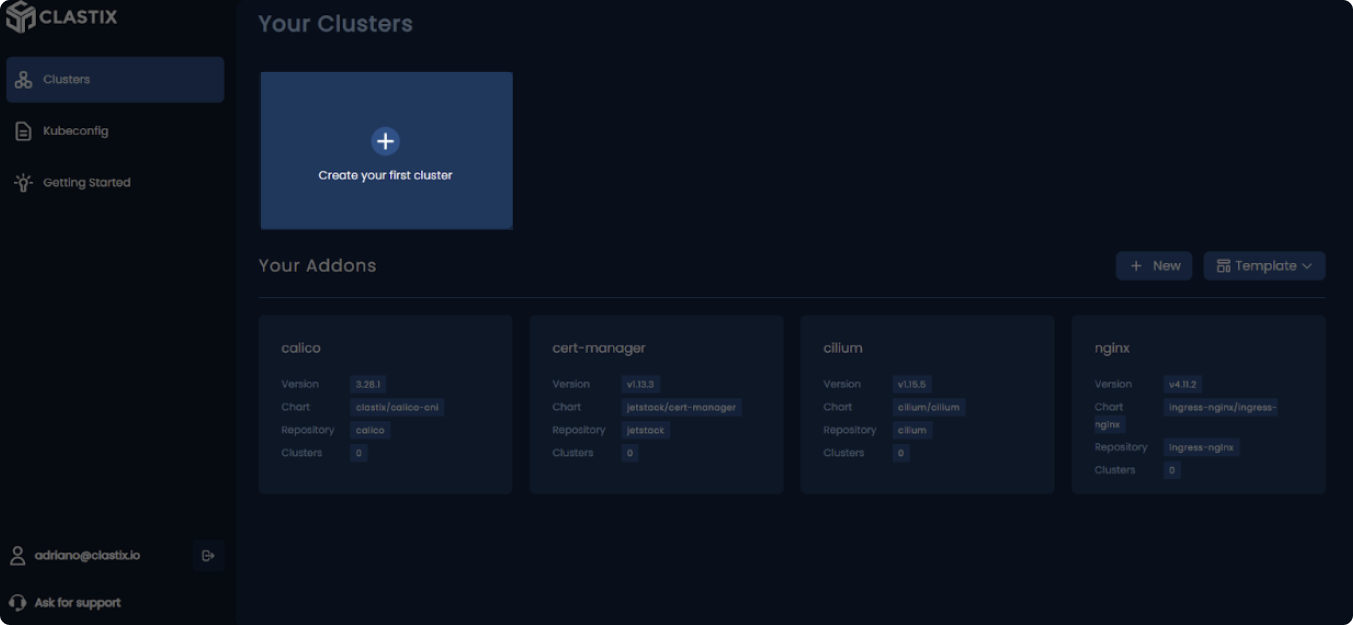
 Click **Create your first cluster**.
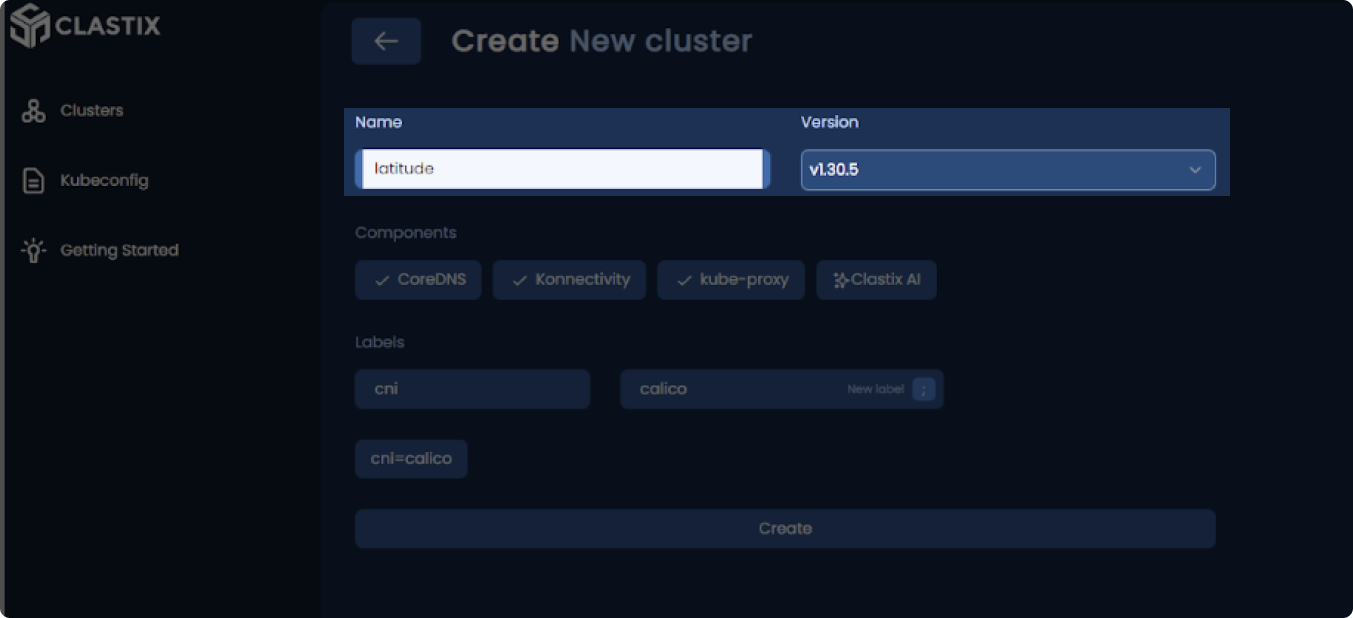
 Give the cluster a name and choose the Kubernetes version.
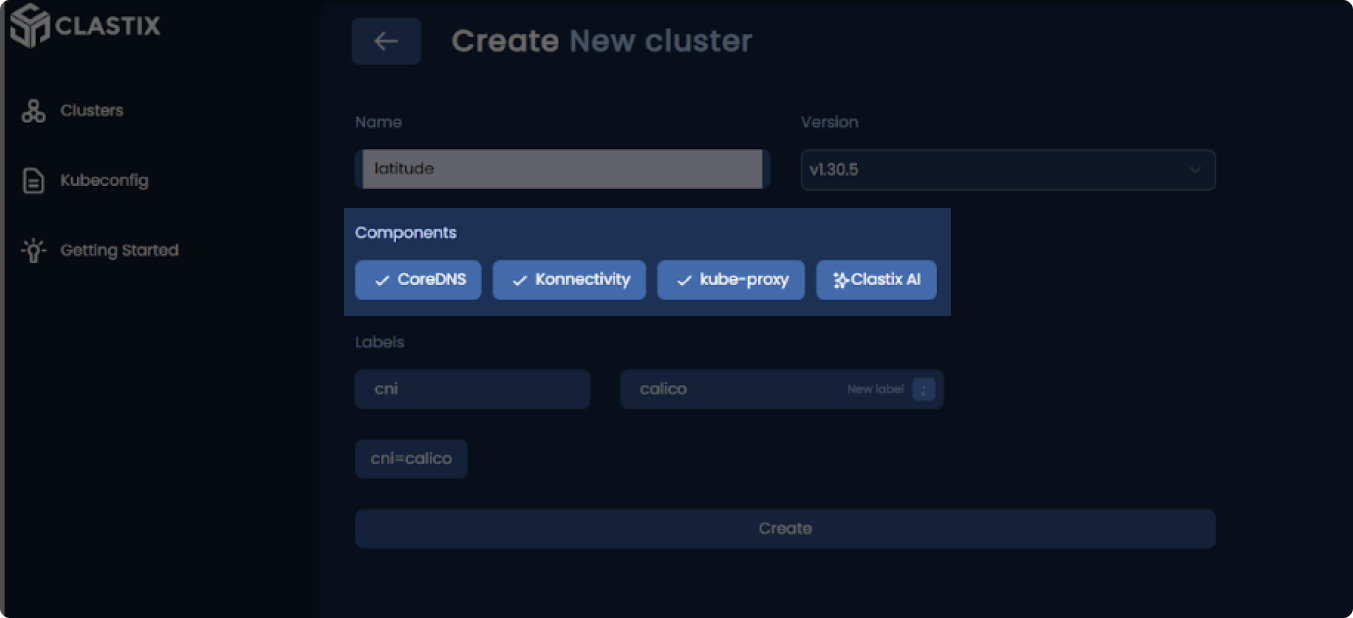
 Select the components CoreDNS, Konnectivity, and kube-proxy, then click **Create**:
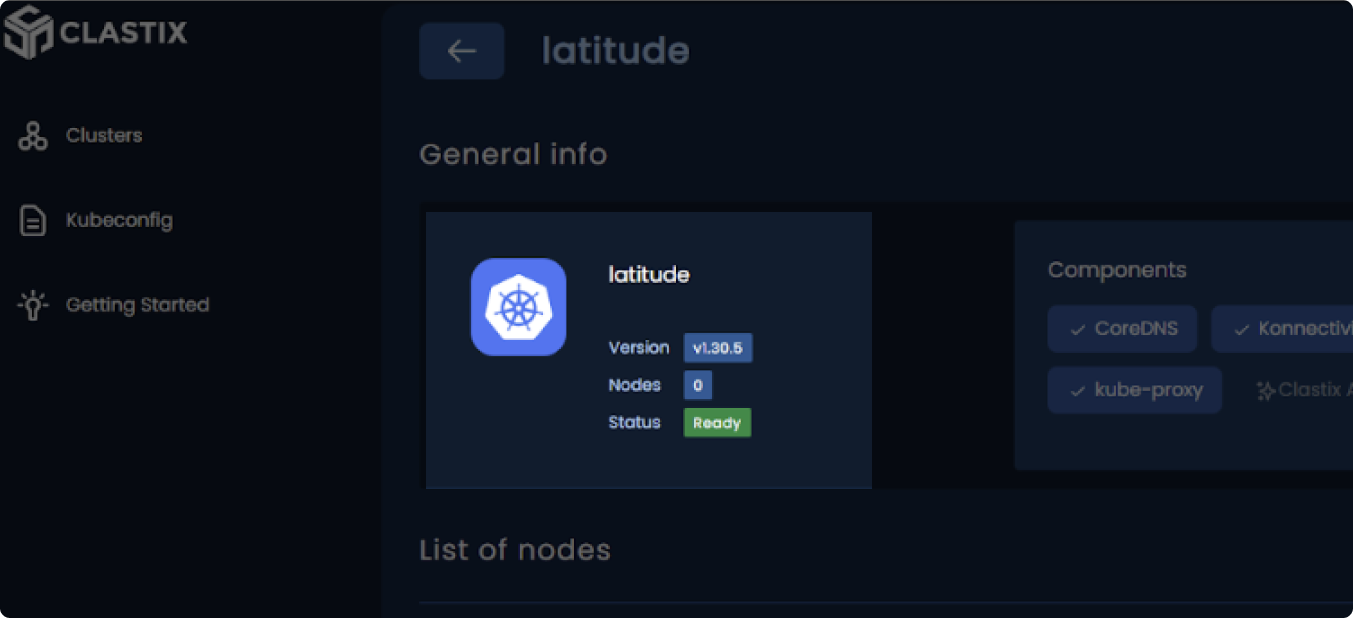
 Wait a few seconds until the status of your Kubernetes Control Plane appears "Ready."
 ## Step 2: Add the bare metal worker nodes
Go to your [Latitude.sh console](https://metal.new/) and deploy two or more servers with **Ubuntu 22.04** or **24.04**.
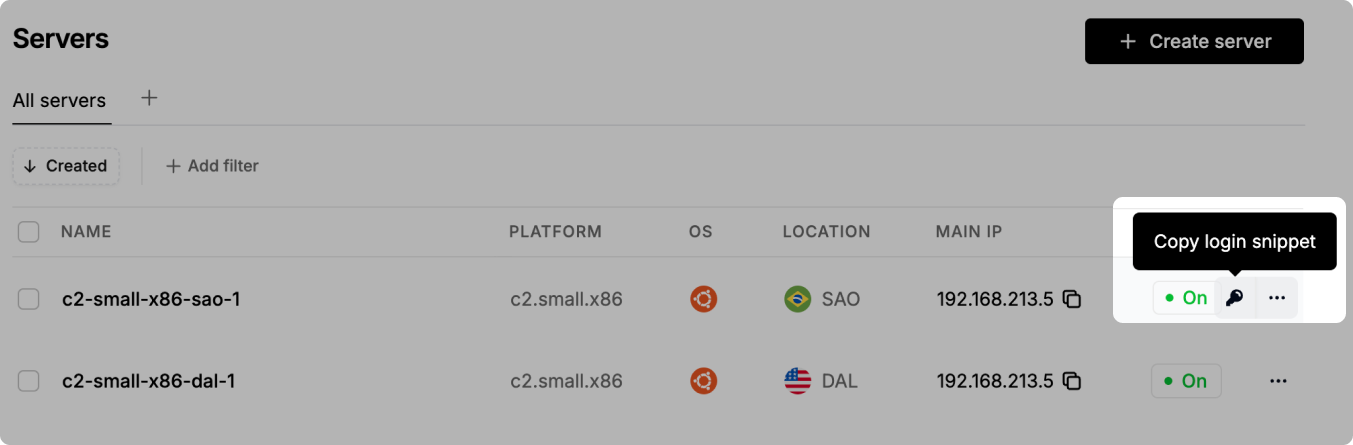
In the server list, click the key icon on the right side of the server row, copy the **login snippet**, and paste it into your terminal to log in.
For more details, see [our docs](https://www.latitude.sh/docs/servers/deploying-a-server).
## Step 2: Add the bare metal worker nodes
Go to your [Latitude.sh console](https://metal.new/) and deploy two or more servers with **Ubuntu 22.04** or **24.04**.
In the server list, click the key icon on the right side of the server row, copy the **login snippet**, and paste it into your terminal to log in.
For more details, see [our docs](https://www.latitude.sh/docs/servers/deploying-a-server).
 After logging in, run the following command to update the package list and install socat and conntrack:
```shell theme={null}
sudo apt update && sudo apt install -y socat conntrack
```
Repeat this process for each server.
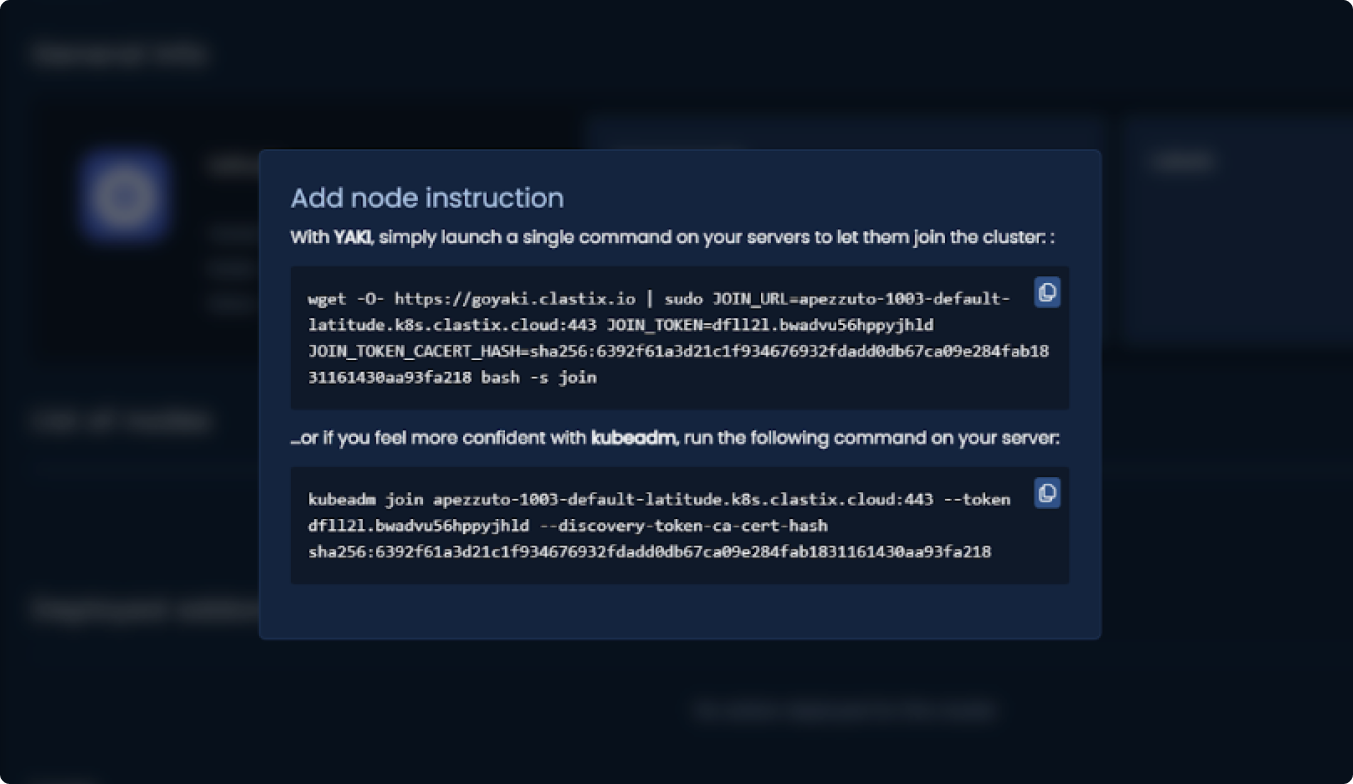
From the CLASTIX console, click on your cluster's badge to open details, copy the **Yaki join command** provided, and paste it into your terminal to add the server as a worker node.
After logging in, run the following command to update the package list and install socat and conntrack:
```shell theme={null}
sudo apt update && sudo apt install -y socat conntrack
```
Repeat this process for each server.
From the CLASTIX console, click on your cluster's badge to open details, copy the **Yaki join command** provided, and paste it into your terminal to add the server as a worker node.
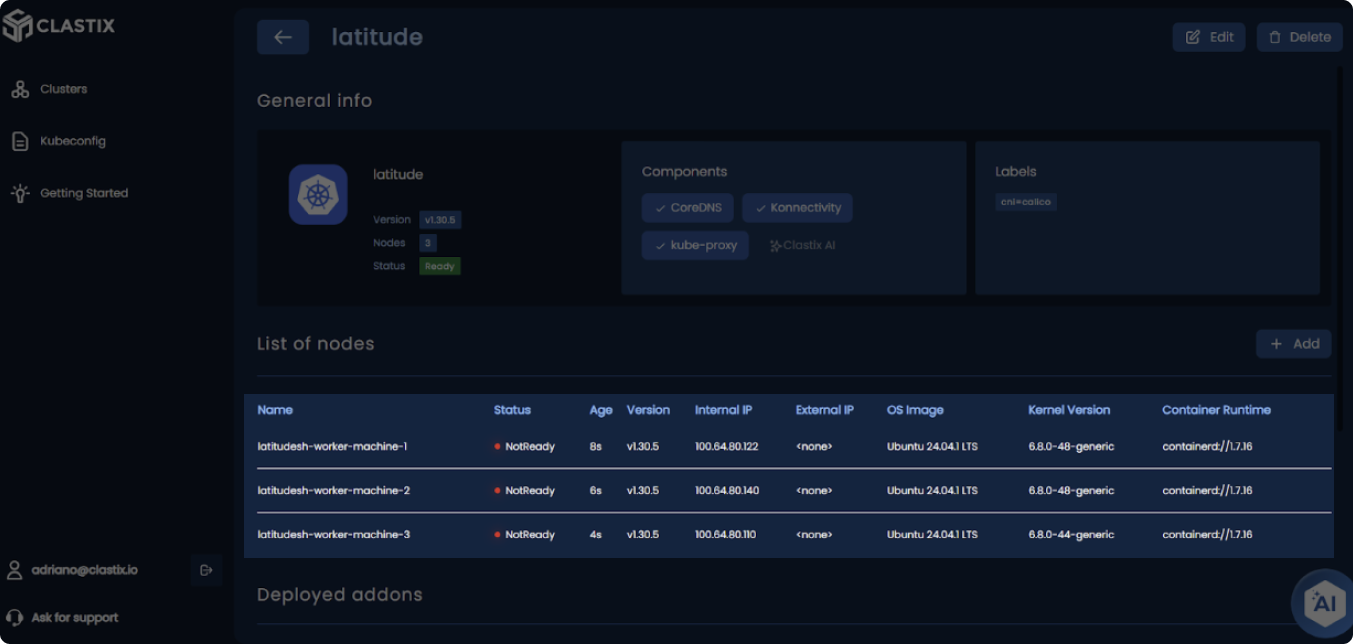
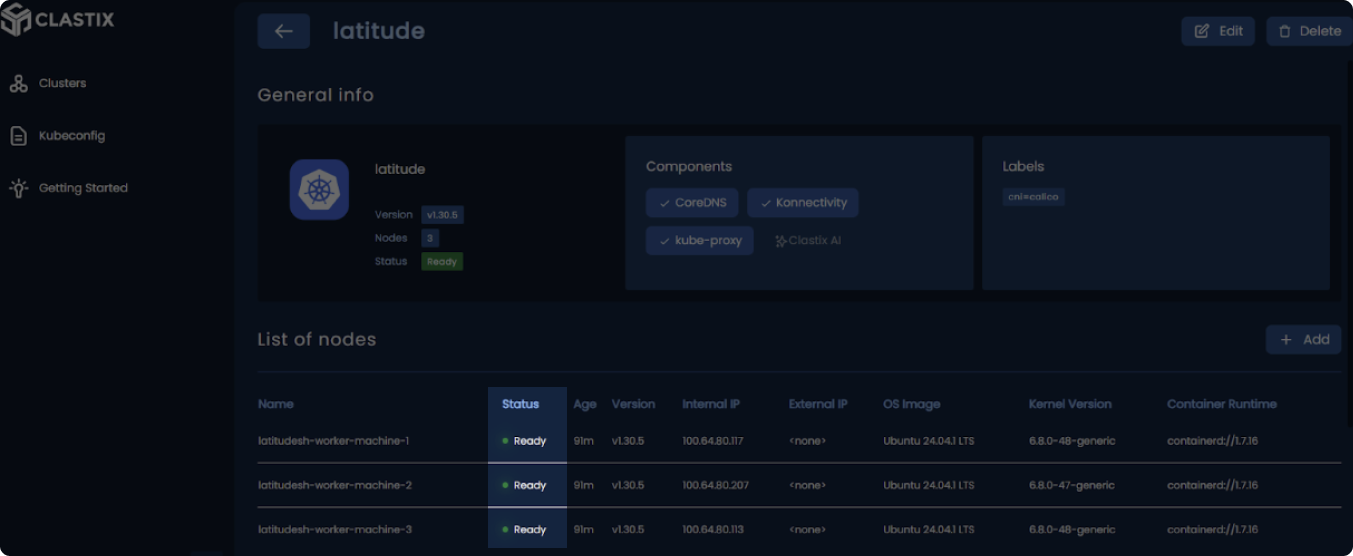
 After your machines join the Kubernetes cluster, they will appear in the "List of nodes."
 ## Step 3: Set up kubeconfig
From the CLASTIX console, copy the kubeconfig and save it in a `file clastix-kubeconfig.yaml` on your workstation.
Set the KUBECONFIG environment variable to point to the location of the kubeconfig file:
```shell theme={null}
export KUBECONFIG=/path/to/clastix-kubeconfig.yaml
```
## Step 4: Install networking add-ons
Your worker nodes will appear "Not Ready" until networking is configured. Follow these steps to install a [CNI plugin](https://kubernetes.io/docs/concepts/extend-kubernetes/compute-storage-net/network-plugins/), such as [Calico](https://github.com/clastix/calico-cni).
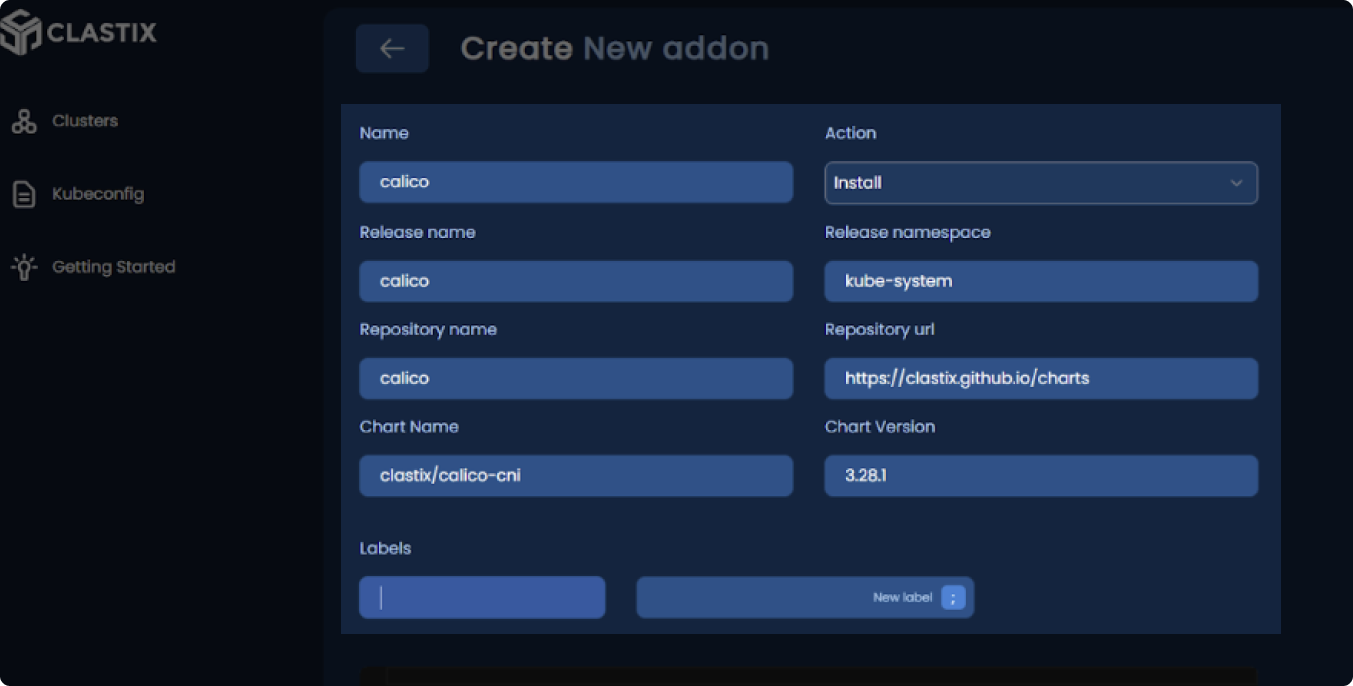
From the CLASTIX console, add a new add-on for Calico by filling in the necessary fields.
## Step 3: Set up kubeconfig
From the CLASTIX console, copy the kubeconfig and save it in a `file clastix-kubeconfig.yaml` on your workstation.
Set the KUBECONFIG environment variable to point to the location of the kubeconfig file:
```shell theme={null}
export KUBECONFIG=/path/to/clastix-kubeconfig.yaml
```
## Step 4: Install networking add-ons
Your worker nodes will appear "Not Ready" until networking is configured. Follow these steps to install a [CNI plugin](https://kubernetes.io/docs/concepts/extend-kubernetes/compute-storage-net/network-plugins/), such as [Calico](https://github.com/clastix/calico-cni).
From the CLASTIX console, add a new add-on for Calico by filling in the necessary fields.
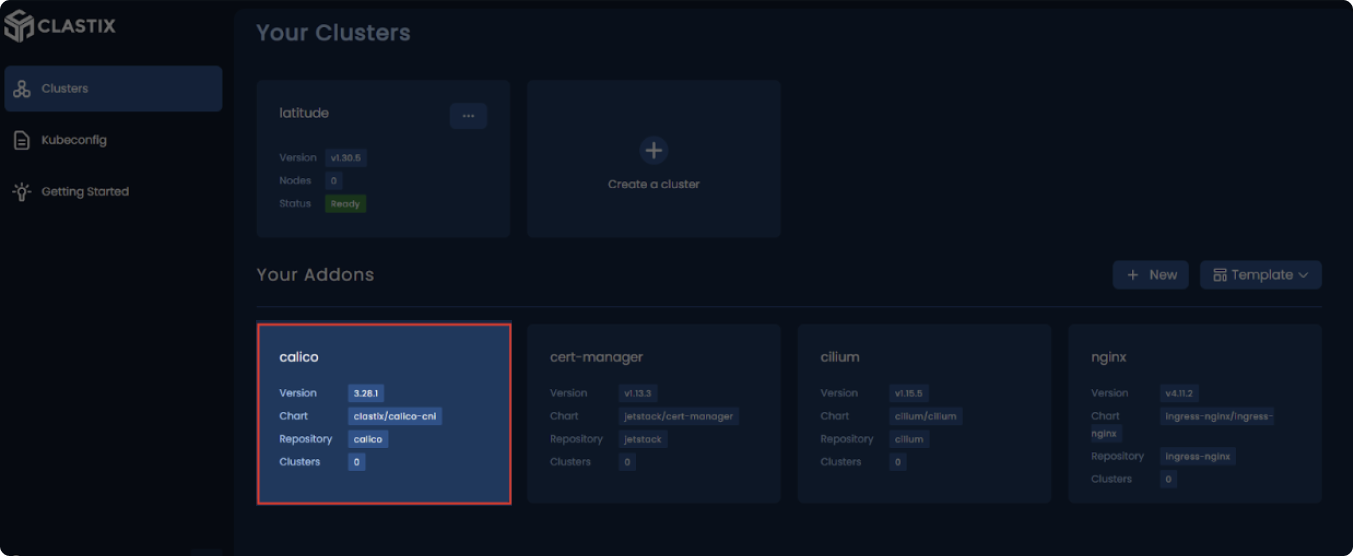
 The new add-on is now listed:
 Wait a few moments until your nodes transition to "Ready".
 ## All set!
Your Kubernetes cluster is now up and running with bare metal nodes, ready for scaling.
To optimize traffic management across your nodes, check out our guide on [Kubernetes load balancing](/docs/guides/kubernetes-load-balancing-on-bare-metal).
## All set!
Your Kubernetes cluster is now up and running with bare metal nodes, ready for scaling.
To optimize traffic management across your nodes, check out our guide on [Kubernetes load balancing](/docs/guides/kubernetes-load-balancing-on-bare-metal).